• Skip to primary navigation
  • Skip to main content
  • Skip to primary sidebar

STEMS & FORKS

Beautiful musings of flora and fare.

  • Home/Blog
  • About
  • Recipe Index
  • Awards and Accolades
  • Contact
  • Workshops
  • Gallery

Family Favorites

Tahini Maple Syrup Brownies

September 6, 2019 By stemsandforks Leave a Comment

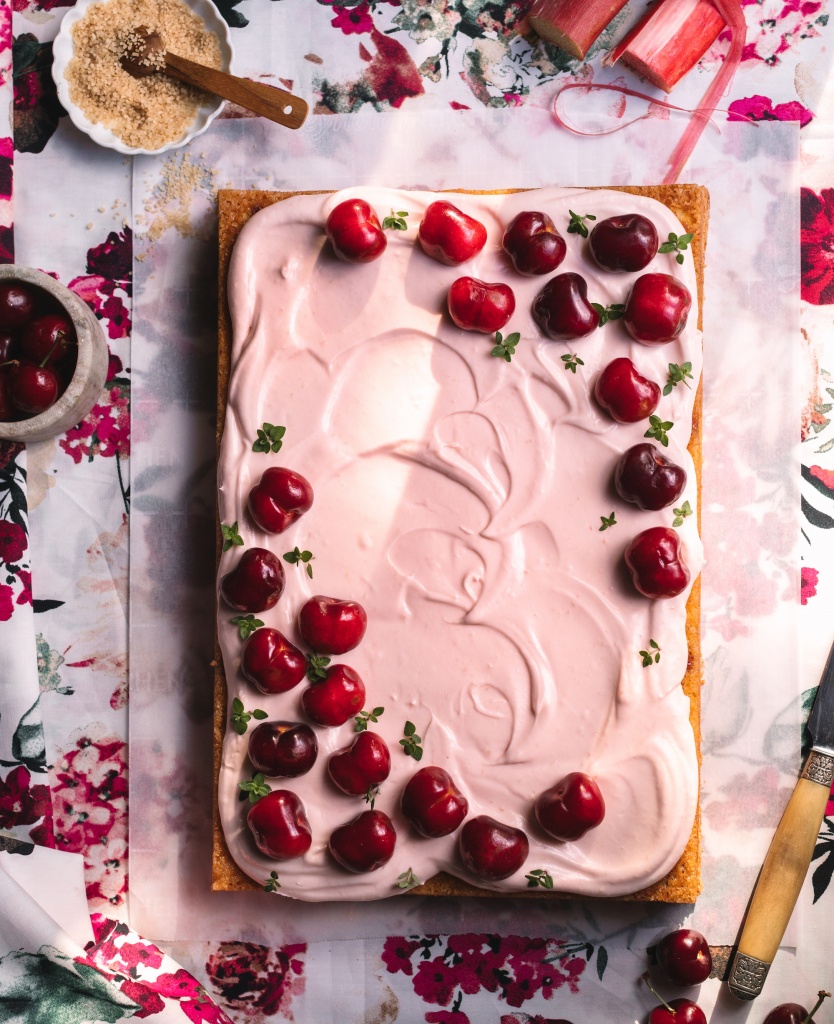
The post was sponsored by Metro Ontario. All thoughts and opinions are my own

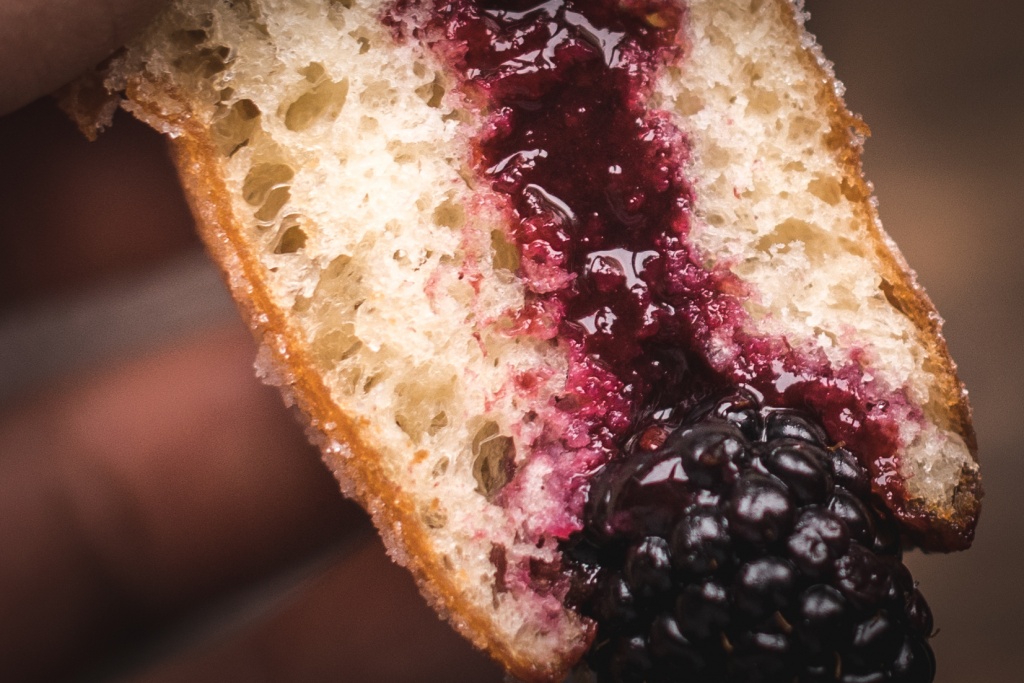
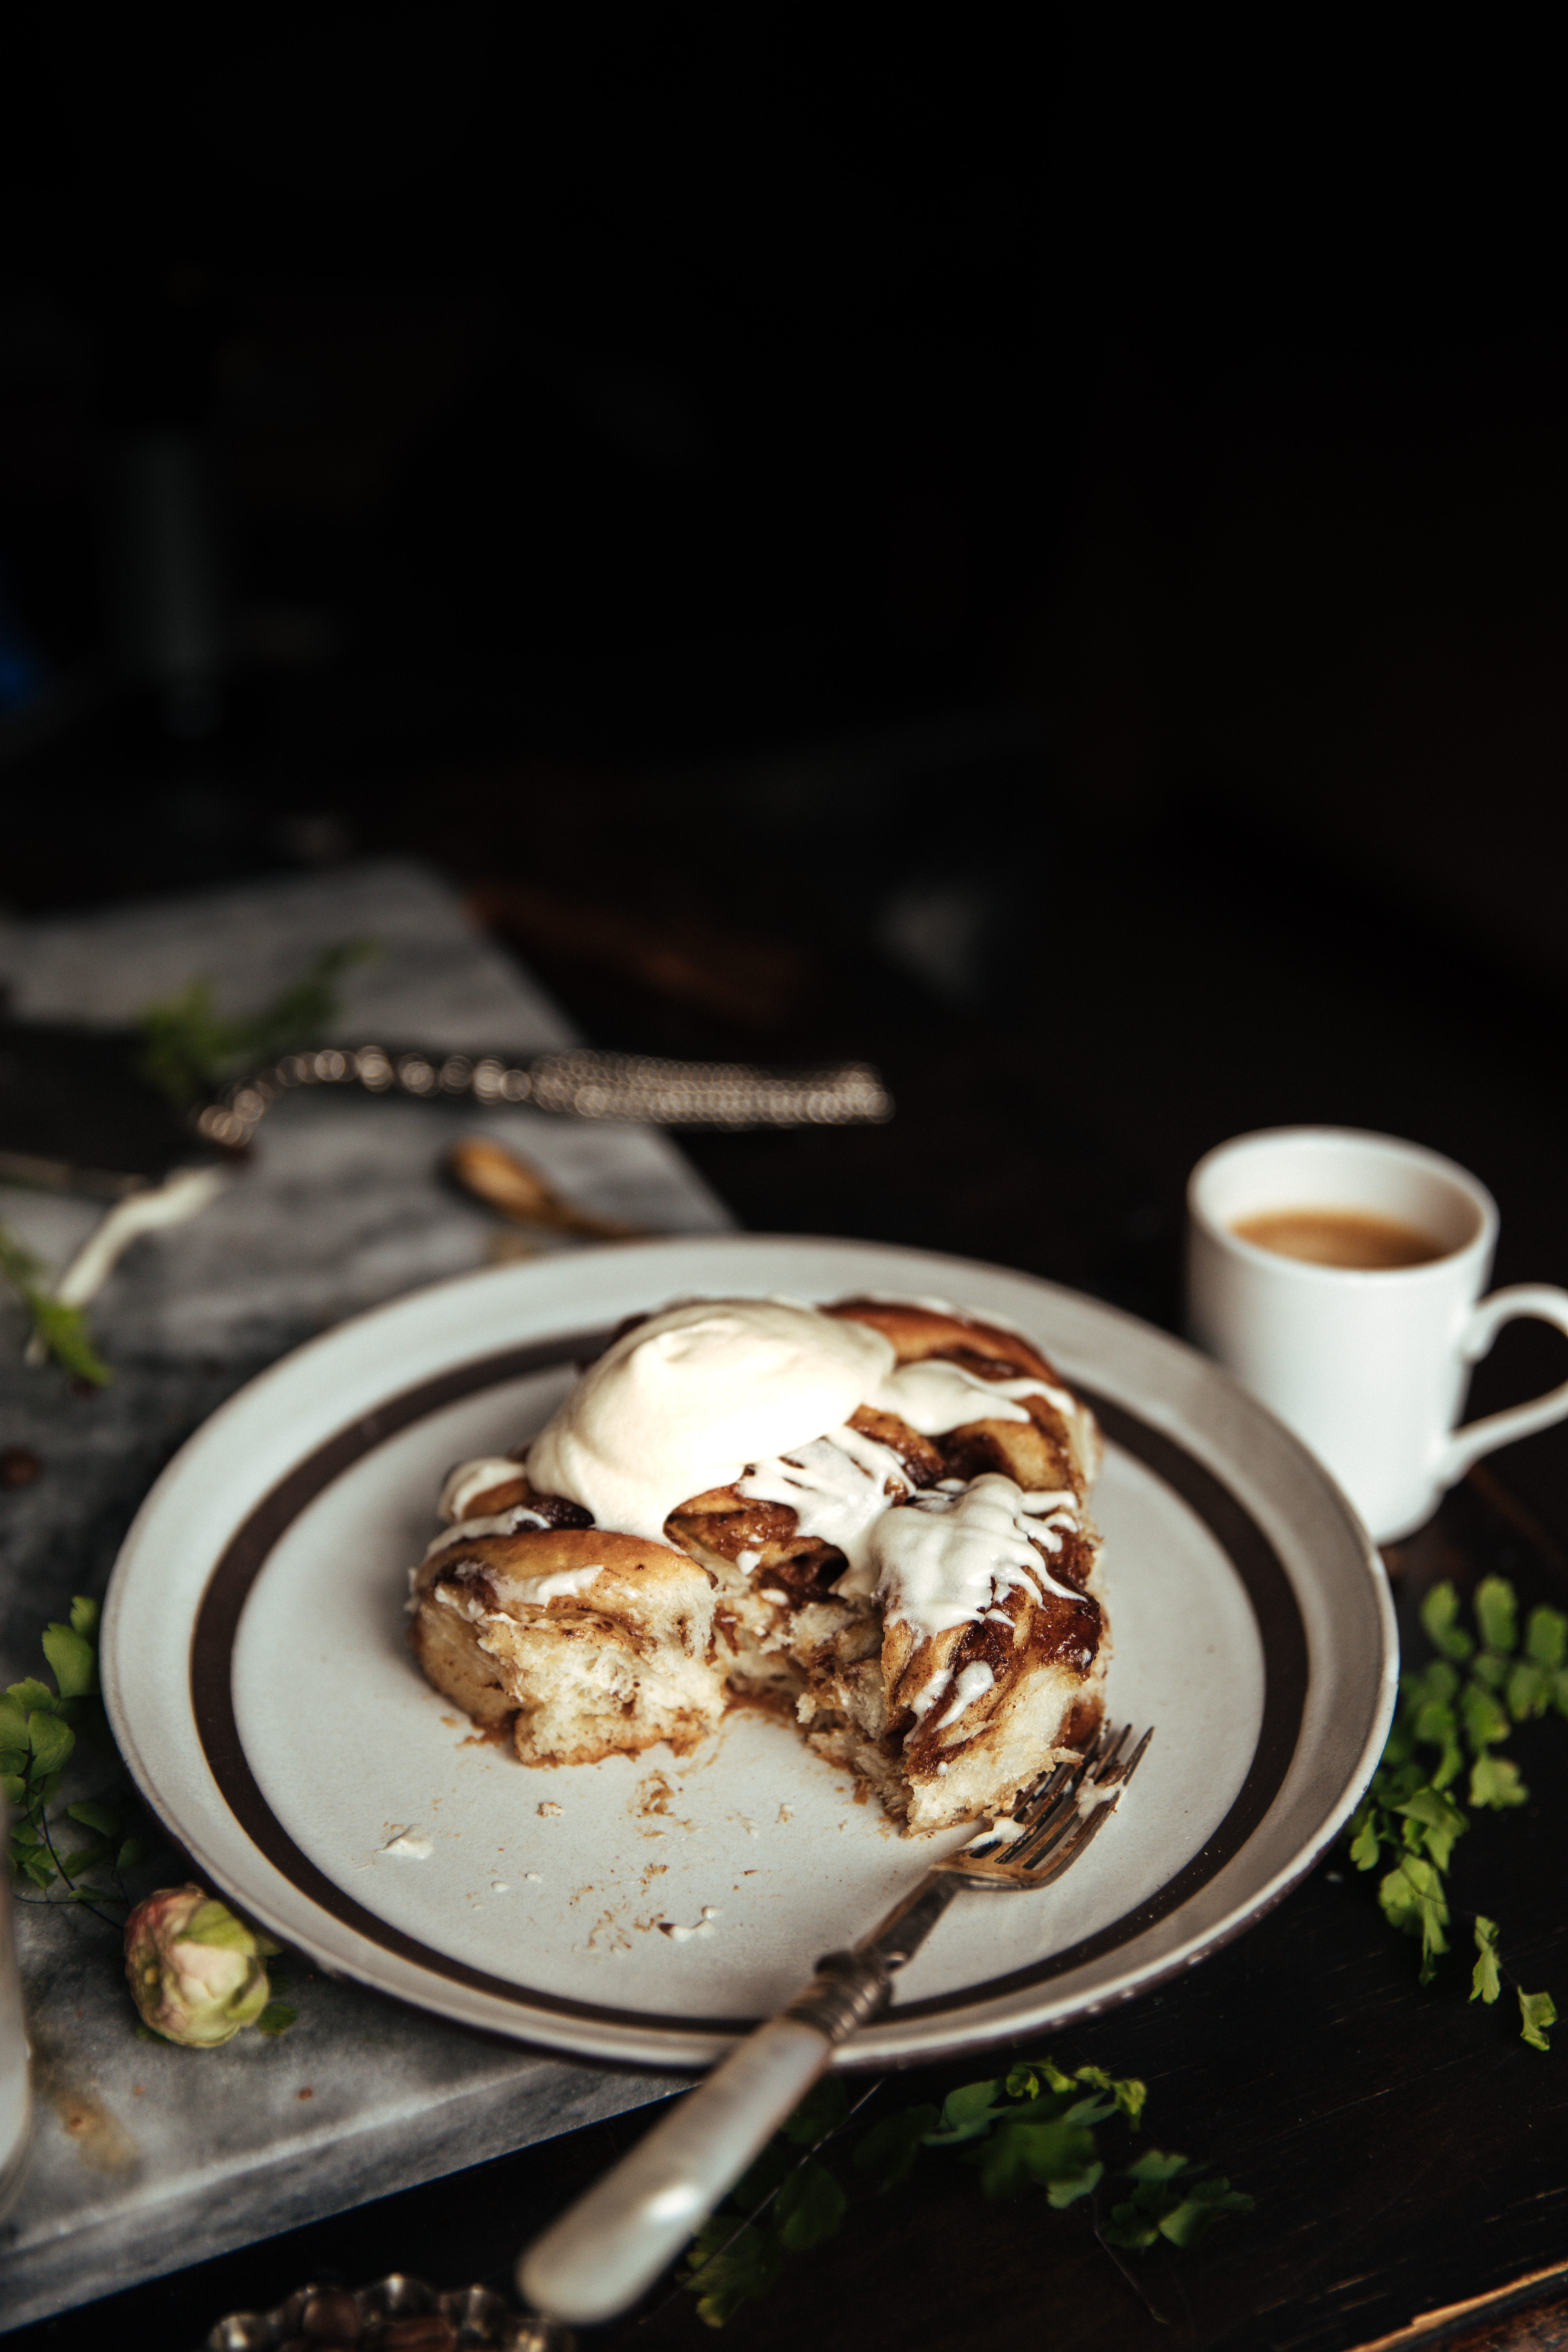
Peanut butter, dry roasted nuts and my childhood favourite, Pirate peanut butter cookies. I loved peanuts and anything peanut. However, as of 2008, I have not had any peanuts. That was the year we discovered my daughter was allergic to peanuts and was classified as anaphylactic. 

The first question I always get from young mothers is, “How did you find out?”. My daughter was 2 years old and a typical toddler. She was a super picky eater when it came to meals. In retrospect, this was a good thing. The day we found out was when I decided to share my peanut butter and jam sandwich. It was a first for Moineau. She took one bite and spat it out with disgust. Moments later, she broke out with a rash around her mouth. After seeing an allergist and getting tested, it was official. She was severely allergic to peanuts.

 …

Read More »

Filed Under: Cakes, Chocolate, Family Favorites, Sponsored, Uncategorized Tagged With: brownies, chocolate, tahini

Rhubarb and Cherry Sheet Cake With Cream Cheese Frosting

June 7, 2019 By stemsandforks Leave a Comment

This post was sponsored by Metro Ontario. All thoughts and opinions are my own. 

It’s late spring early summer here in southern Ontario. When the sun stays up and shines longer, the days are warm but not too hot and the evenings are just cool enough for an outdoor fire without those pesky mosquitoes. June is definitely my favourite month of the year. 

Asides from June’s fantastic weather is the incredible local produce that starts to hit the Metro stores across Ontario. Asparagus, strawberries, radishes and cucumbers are just a few items that are available locally from the fields of Ontario farmers. Not to mention the handful of other goodies coming from indoor greenhouses like bell peppers, mushrooms and tomatoes.

But hands down my favourite produce for the month of June is rhubarb and cherries. It’s as though these two were made for each other. The tartness of the rhubarb and the sweetness of the cherries are indeed a match made in heaven in this sheet cake. And the cream cheese frosting elevates this sweet and tangy cake.

…

Read More »

Filed Under: Cakes, Family Favorites, Fruit, Sheet Cake Tagged With: baking, cake, cherry, creamcheese, recipe, rhubarb, sheet cake

Blackberry Jam filled Donuts

May 17, 2019 By stemsandforks 2 Comments

I recently did a survey on my Instagram feed to see how many of you actually read blog posts…less than 50% read…most of you scroll through pics and just get right down to business with the recipe. So I decided to take a different approach today. Today’s blog post will be short and very sweet. a paragraph to sum up what this donut is. And a paragraph with short notes for handy tips and tricks… Leave a comment if you have time (something everyone said they were short on) and let me know if you prefer this sort of blog post!

ABOUT: This donut is also known as Berliner Pfannkuchen or pączki. Whatever you want call them, these donuts are AMAZING! How could it possibly go wrong when one deep fries brioche dough, cover it with sugar then fill homemade blackberry jam!!!

TIPS/NOTES:

  • Make sure yeast hasn’t expired…I store mine in the freezer !
  • I often get comments/messages that their yeast didn’t poof or their dough didn’t rise…either the water was too hot or not hot enough or the yeast has expired
  • This recipe calls for 1 tablespoon of yeast. I have tested this recipe with 2 teaspoons and 2.5 teaspoons and Ive decided that 1 tablespoon is best for the fluffiest donuts…If you’re curious to know more about this yeast testing…feel free to email me.
  • This is a sticky dough…Don’t be tempted to keep adding flour.
  • After kneading and the first rise, let it rest overnight in the fridge…makes dough easier to work with and has time for the flavours to work itself in the dough
  • As well overnight chilling makes for better texture.
  • Dough can be stored in fridge for up to 2 days
  • Donuts need to be eaten same day when fried…I’m confident there will be no leftovers.
  • The jam recipe yields about 1/2 cup of jam-i prefer my donuts with less jam…If you prefer loads of jelly, feel free to double the quantity for the jam!
Dough is almost ready for it’s first rise.
A look inside from one of the smaller donuts
An earlier test version…These didn’t get a second rise once they came out of fridge…You can see they are not as fluffy.


Blackberry Jam Filled Donuts
2019-05-17 16:50:57
Yields 12
Write a review
Save Recipe
Print
Prep Time
14 hr
Cook Time
12 min
Prep Time
14 hr
Cook Time
12 min
INGREDIENTS For the Dough
  1. 1 Tablespoon traditional yeast
  2. 1 teaspoon white granulated sugar (for the yeast)
  3. 1/2 cup milk
  4. 1 teaspoon salt
  5. 455 g or 3 1/2 cups all purpose flour
  6. 50 g or 1/4 cup granulated white sugar
  7. 4 large room temperature eggs
  8. 85 g or 3/8 cup or 6 tablespoons unsalted butter room temperature & cubed
INGREDIENTS For the Blackberry Jam
  1. 340 g or 12 ounces fresh blackberries
  2. 1/2 cup white granulated sugar
  3. 2 tablespoons lemon juice
  4. 1 tablespoon cornstarch
INGREDIENTS for Frying/Finishing touches
  1. 6-7 cups of vegetable or light oil
  2. 300 g or 1 1/2 cups granulated sugar for dusting the donuts
  3. 6 oz or 170 grams = about 24 blackberries to plug the holes
INSTRUCTIONS For the Jam
  1. Make the jam while you're waiting for the first proof or when the dough is chilling overnight
  2. In a medium saucepan on medium heat, stir the blackberries, and sugar together.
  3. Mash the berries with a masher
  4. In a small bowl mix 1 tablespoon corn starch and 1 table spoon water together, add to simmering blackberries and stir until it starts to thicken.
  5. Stir and heat for another 15 minutes or until it has thickened (will thicken more when cooled)
  6. Remove from heat and run through fine sieve to remove the seeds
  7. Set aside to cool - add the lemon juice then cover and store in fridge overnight
INSTRUCTIONS For the Dough
  1. In a small bowl, mix 1 teaspoon white sugar and 1 tablespoon yeast, set aside.
  2. In small saucepan, warm up 1/2 cup milk to a simmer until it reaches 110F (not too lukewarm but not to hot to touch- just use a thermometer !)
  3. Pour over the sugar/yeast and stir. Set aside and allow to poof about 8 minutes
  4. In bowl, whisk together the flour, salt, and 1/4 cup sugar
  5. In stand mixer bowl with paddle attachment, beat the 4 eggs, then add the poofed yeast/milk mix
  6. On low, beat in the flour mix-will look shaggy
  7. Swap out the paddle to the kneading hook and knead on medium speed for 2 minutes until it forms into a large sticky ball like form-scrape down sides with spatula
  8. Add the butter, a cube at a time making sure each cube is well mixed in before adding the next cube of butter (still medium speed)
  9. Drop speed to low and knead for 5 minutes
  10. Dough is ready when it is glossy and somewhat translucent but doesn't tear
  11. Remember this dough is a sticky dough. Refrain from being tempted to add more flour...It will be less sticky after an overnight chill!
  12. Cover your bowl with a damp kitchen towel, leave in warm room for 1 to 1.5 hours or until it has doubled in size
  13. Punch dough down once, cover with plastic and refrigerate overnight
INSTRUCTIONS for prepping the donuts
  1. Cut out 16 or so 4 inch square parchment papers, dust with a bit of flour and place on a couple large trays and set aside
  2. Turn dough out onto lightly floured counter
  3. Roll out dough into a 9.5 inch by 13 inch rectangle, 1/2 inch thick and cut out about a dozen three inch discs with a biscuit/cookie cutter (and maybe a couple smaller donuts from the edge of dough)
  4. (You can take the cut out dough and re-roll 1 more time to get 3 more donuts-note these will not be as nice looking as the original discs)
  5. Transfer all the discs with a non stick food turner (flipper) to the parchment paper squares
  6. Cover completely with a damp thin cheese cloth or plastic making sure the plastic doesn't touch the dough...you can do this by placing small tumblers or shot glasses in between the discs
  7. Place in warm area of home and let rise another 1 hour
  8. If you feel like they are over rising/proofing, then start frying...overproofing will have them smelling like yeast
INSTRUCTIONS for Frying the donuts
  1. Fill a piping bag with the cooled blackberry jam and a small round tip, set aside
  2. Lay out a few paper towels on a baking tray
  3. Pour the 1.5 cups of granulated sugar on a plate ready for donuts to be dusted
  4. Add the vegetable oil to a large heavy bottomed pot or your deep fryer to 350°F - 365°F.
  5. Take the discs of donuts flipping it over with the parchment paper and drop in oil ...Fry 3 at a time...more will alter the temperature of the oil
  6. Fry each side about 2-2.5 minutes or until golden brown and transfer to paper towel with a slotted spoon
  7. Roll in the sugar after about a minute of cooling and set aside on a baking rack or wooden board
  8. Do this to all the donuts
  9. Take a chopstick or something to poke two holes on opposite sides of all the donuts
  10. Gently fill jam on both sides of donut with pastry bag
  11. plug the two sides of the donut holes with a fresh blackberry
  12. Bon app!
Notes
  1. Donuts must be eaten same day as when its been fried.
  2. I tend to like my donuts to have less jam than the typical donut...feel free to double amount of jam (ingredients would double)
Adapted from Brioche dough adapted from The Kitchn
STEMS & FORKS https://www.stemsandforks.com/


Filed Under: berries, Donuts, Family Favorites, Fruit Tagged With: babka, blackberries, brioche, donuts, jam, yeast

Espresso Cinnamon Buns

April 19, 2018 By stemsandforks 26 Comments

When my Belgian husband Pierre first immigrated to Canada, he was taken aback by the coffee culture here in Canada. “I find it so bizarre that North Americans can guzzle down this watery, sad version of what you call coffee.” This is where I explained to him coffee here wasn’t just about functionality and flavour profile. There’s an enormous social and cultural undercurrent surrounding coffee here. “Let’s do coffee.” Synonymous to let’s gather. Let’s gather and talk about anything and everything which will potentially take more than a few minutes…in which case we’ll need a heaping cup of coffee and some dessert to go with it. 

Of course Pierre, who was accustomed to little espresso shots in Europe has finally acclimatized to the Canadian coffee culture. Now, he’s the biggest advocate for taking the time to enjoy an oversized mug of java over long and meaningful conversations with loved ones. It only took ten years…

And I suppose that’s where this virtual coffee party all started. The talented Nate of the Terminatetor Kitchen wanted to “do coffee” with a few international fellow food bloggers. What better way to celebrate and connect but through a coffee recipe.

So I invite you to call a few friends, gather, brew a pot of java, bake these buns (which by the way are SUBLIME) and “do coffee”. 

Check out some of the other amazing coffee inspired recipes by my fellow food bloggers below:

Alexcrumb • Vegan chocolate meringue pie

Ananás e Hortelã • Strawberry Rolls with White Chocolate Glaze

Black.White.Vivid • Emirati Sweet Dumplings with Coffee Syrup (Luqaimat)

Cloudy Kitchen • Tiramisu Sheet Cake

DisplacedHousewife • Banana Espresso Cake with Espresso Bean Buttercream

Feed Me With Amanda • Tea Infused Shortbread

Feed The Swimmers • Fudgy Espresso Sweet Potato and Black Bean Brownies with Hazelnuts

and a Coffee Cream Cheese Frosting

Flor de Cerejeira • Mocha Orange Entremet

Flour Covered Apron • Espresso Banana Muffins with Chocolate Espresso Glaze

From Scratch Mostly • Argentinian Dulce de Leche Churros, Dipped in Coffee Chocolate Sauce

Harvest & Honey • Mocha-Braised Pork & Polenta Bowls

HonestlyYUM • Cafe Con Tres Leches Cake

Love Olive • Breakfast Almond Pancakes with Coffee Syrup

Milk of Thy Kindness • Best and Easy Coffee & Avocado Indo Style

Stems & Forks • Espresso Cinnamon Buns

TermiNatetor Kitchen • Blueberry Creme Fraiche Coffee Cake

The Almond Eater • Mocha Tahini Fudge

The Cinnaman • espresso ricotta cheesecake with emirati date crumb (batheeth)

The Korean Vegan • Vegan Tiramisu

Bon app!

Espresso and Cinnamon Twist Buns
2018-04-19 16:42:01
Serves 8
Write a review
Save Recipe
Print
Prep Time
4 hr
Cook Time
22 min
Prep Time
4 hr
Cook Time
22 min
FOR THE DOUGH
  1. 1 teaspoon white granulated sugar for the yeast
  2. 1 tablespoon traditional active dry yeast
  3. 1/3 cup milk
  4. 3 3/4 cups - 4 cups or 490 grams - 520 grams of all purpose flour
  5. 1 teaspoon salt
  6. 1/2 cup or 100 grams white granulated sugar
  7. 3/4 cup buttermilk room temperature
  8. 6 table spoons very soft room temperature unsalted butter
  9. 2 large eggs room temperature
FOR THE FILLING
  1. 1 stick or 1/2 cup or 115 grams of unsalted butter room temperature
  2. 3/4 cup or 175 grams brown sugar
  3. 1 1/2 tablespoons cinnamon powder
  4. 1 tablespoon instant espresso powder (if its in flake form, put in ziploc and roll a rolling pin over it till it becomes a powder) Substitutes: instant coffee
GLAZE
  1. 1/4 cup heavy cream
FOR THE FROSTING
  1. 3 ounces or 85 grams cream cheese room temperature
  2. 1/4 cup or 55 grams unsalted butter room temperature
  3. 1 1/4 cup or 155 grams icing/powdered sugar
Instructions
  1. Instructions for the dough
  2. Scald 1/3 cup milk in small sauce pan till small bubbles form at side of pan or until it reaches a temperature of 110-120 F and is very warm to the touch but not so hot that it’s unbearable to touch
  3. Gently stir in the teaspoon of sugar and tablespoon of yeast. Set aside to poof to double it’s size… about 8-10 minutes
  4. In stand mixer with paddle attachment, mix the buttermilk, the eggs, salt and 1/2 cup sugar with the 6 tablespoons of very soft room temperature butter… Don’t worry too much if the butter is lumpy.
  5. Once the yeast has poofed pour into the stand mixer bowl and stir for a few seconds
  6. Swap out the paddle attachment now with the hook attachment
  7. Add about half the flour in until shaggy and somewhat combined, then add the rest of the flour and knead for about 8 minutes on low speed.
  8. Dough should be smooth, shiny, tacky and stick to the bottom of the bowl (not the sides) don’t be tempted to keep adding flour. Only add more if it’s sticking to sides and bottom…and add a spoonful at a time only. Less is more here. If it’s too dry, add a spoon of milk
  9. Transfer to a lightly oiled bowl keeping in mind the dough will double…cover with plastic and allow to rise in a warm part of home…2 - 2 1/2 hours
  10. Line with parchment or generously butter a 12 inch baking pan or pizza pan (with no holes on the bottom. I used a pizza pan) and set aside
  11. In a medium bowl, mix the cinnamon, brown sugar and espresso powder together and set aside
  12. Once the dough has risen to at least double, lightly dust a work surface with flour
  13. Punch dough down and transfer to counter. Take sharp serrated knife or dough scraper and cut the dough into 4 equal parts.
  14. Roll each of the pieces out in a rectangular shape about 8 inches by 12 inches
  15. Slather/spread about two tablespoons (from the half cup butter) on each rectangle using your fingers and leaving about half an inch on the edge of the entire border
  16. Sprinkle and spread about a quarter of the filling per rectangle and roll snuggly
  17. Not mandatory but very helpful at this point to chill the rolled dough for about 15 minutes before proceeding to next step - slightly chilled dough makes it easier to work with.
  18. Once all four have been rolled, take a very sharp serrated knife and cut down lengthwise centre and set aside
  19. You should have 8 tendrils now
  20. Refer to pics above for the following steps
  21. Take the tendril and bend at the center to make a “U”
  22. Twist/braid the the two 'legs' so they weave together
  23. Now starting from the center end, roll the weaved tendril all the way in a swirl motion.
  24. Once you’ve reached the end, tuck that tail under the bun
  25. Repeat with all 8 tendrils
  26. Arrange your rosy buns on your baking pan or pizza pan and completely cover with a damp cheesecloth or light kitchen towel (dampen cloths by soaking with water than wringing out excess water)
  27. Place in warm area for the second rise (until they’ve almost doubled in size) about 1 hour
  28. Preheat oven to 375 F and place rack to middle position in oven
  29. Brush on/pour over the 1/4 cup of cream all over the buns…make sure you use the entire 1/4 cup…its okay if it puddles between the buns…the liquid will get absorbed as it bakes
  30. Bake for 20-22 minutes…I usually tent mine with aluminum foil for the last 5 minutes as my buns tend to brown rather quickly towards the end. All ovens vary, so keep an eye on your buns to avoid over browning!
  31. They are ready once the internal temperature in the center of the buns reads 185 F on a thermometer and no longer looks doughy.
  32. While the buns are baking, prepare the frosting
  33. With paddle attachment, beat the room temperature cream cheese until smooth and creamy, then add the butter and beat until fully incorporated (if it gets lumpy, blow a hair dryer over the frosting while it’s beating for a few seconds)
  34. Add the powdered sugar and beat until smooth and silky
HOW TO SERVE
  1. There are a few ways to serve with the frosting.
  2. You can slather the entire pan of buns with the frosting while they are still a bit warm (not hot)
  3. Probably the most appetizing, but also the messiest and unestheitcally pleasing as the frosting completely covers the beautiful rosette buns
  4. The other way to serve is by lightly drizzling the frosting over the buns with a spoon or fork once they’ve cooled and serving with a heaping dollup of extra frosting on the side.
  5. Or serve these buns as is with a side of frosting for dunking.
  6. Anyway you pick, it’ll all be super yummy and fun.
Notes
  1. If using a pizza pan to to bake buns, make sure you line the bottom of your oven with some aluminum foil as there could be some excess filling that spills over
  2. Buns are ideal same day they are baked. However, keeps well for up to 3 days wrapped or in an airtight container.
By Betty Binon
STEMS & FORKS https://www.stemsandforks.com/

Filed Under: Breads, Breakfast, Brioche, Family Favorites, Snacks

Chocolate Cake with a Coffee Swiss Meringue Buttercream and Maple Glazed Walnuts

March 16, 2018 By stemsandforks 6 Comments

On one of my recent blog posts, Orange Cardamom Cake with Blackberry Curd, a reader left a comment that left me scratching my head. She wrote, “I have tried to make this cake twice and the cake has fallen – severely – before taking it out of the oven. I have years of baking experience, and can’t get this to bake right.”

Of course, my heart sank. How could this be? I referred back to the cake recipe and scrutinized it line by line, and was still left baffled. I knew I had baked this cake several times and wondered what had gone amiss. After several conversations between the reader and myself, and I discovered exactly what went wrong. She had used a 6 inch pan the first time and an 8 inch pan the second time, when the recipe had called for a 9 inch pan. Using pans of another size, other than what the recipe calls for, (even a mere inch) can cause the cake to collapse in the middle and/or cause the excess to flow over the edge of the pan.

The fact that this particular reader was a seasoned baker, made me realize that although many home bakers out there may have decades of experience, it is probably in baking the same repertoire of recipes over and over. For instance, a simple pound cake or chocolate cake most likely won’t sink if substituting with a slightly different pan size. But for a genoise, sponge, angel, chiffon or any cake using egg whites and air to leaven (raise/suspend), the cake would definitely end up with a monumental crater. 

Chopping board provided by https://www.tshirtstudio.com

I’ve decided to do a quick checklist here with brief explanations on how to achieve that perfect cake. I’ll dedicate a more detailed blog post at a later time but for now I thought I’d share these quick tips to help you avoid any cake disasters.

-Check that your oven’s temperature is correct with an oven-safe thermometer.

-Always use the pan size indicated in the recipe. Using a smaller pan than what is called for in the recipe will cause the cake to collapse in the middle (and over flow on the sides). While baking, the cake expands and rises and has nowhere else to go. Thus, the flop and spillover. On the opposite spectrum, using a pan larger than what the recipe indicates may result in a flat and dry cake.

-Grease pan with butter and dust with flour on sides and line bottom of pan with parchment paper (that you’ve traced and cut out).

-Glass and dark-coloured pans usually bake things faster…reduce oven by about 25F or check up on cake a bit earlier. Normally recipes are based on aluminum/light-coloured pans.

-Always measure flour and most ingredients by weight. If you don’t have a scale, don’t scoop the flour directly with a measuring cup. Take a spoon and spoon it into the measuring cup and level off with a knife.

-Sift all your ingredients including sugar (especially brown sugar). Nothing like baking a gorgeous cake only to find a big air pocket inside after slicing into it. 

-Make sure you thoroughly whisk your flour and baking powders/sodas together

-Have all your ingredients come to room temperature (unless otherwise stated) – especially eggs, milk, creams, cheeses etc. This helps create a lighter texture and an even bake.

-If you’ve forgotten to bring your eggs to room temperature, soak them in a bowl of warm water for 10-15 minutes. 

-Don’t stray too much from the recipe. If it says 2 cups of flour, don’t add another half cup. In baking, even the slightest variation in ingredient ratios can throw the entire recipe off.

-When testing with a toothpick, dont wait till it comes out perfectly clean. A few crumbs on the toothpick is the perfect time to take out of the oven as the cake will continue to cook when taken out

-Brush your cakes with a simple sugar syrup while still warm. Its simple to make- equal amounts of water to sugar…bring to boil and brush over cakes. This will make your cakes moist for days!

Now back to what this blog post was really about…chocolate cake. The recipe below was tested at least a dozen times with various ingredients…sour cream instead of yogurt, butter instead of oil, unsweetened chocolate rather than semi sweet, raspberry buttercream instead of coffee…etc. And the end result was a gorgeous, moist, crumb. Sweet but not overly sweet with a smooth silky coffee buttercream with a nutty crunch. The recipe below is for a double layer cake and is quite large. You can easily make this cake into a single layer by dividing all the ingredients by half. This makes a single nine inch cake. I hope you enjoy it. 

Bon app!

Chocolate Cake with Coffee Swiss Meringue Buttercream and Toasted Maple Syrup Walnuts
2018-03-15 00:24:27
Serves 12
Write a review
Save Recipe
Print
Cook Time
20 min
Cook Time
20 min
FOR THE CAKE
  1. 390 or 3 cups all purpose flour sifted
  2. 2 1/2 teaspoons baking powder
  3. 1 teaspoon baking soda
  4. 1 teaspoon salt
  5. 225 grams or 8 ounces of semi-sweet chocolate finely chopped
  6. 85 grams or 1 cup sifted cocoa powder
  7. 2 tablespoons instant coffee or espresso powder
  8. 2 1/2 cups boiling water
  9. 1 1/2 cups canola or vegetable oil
  10. 6 eggs room temperature
  11. 400 grams or 2 cups white granulated sugar
  12. 200 grams or 1 cup brown sugar
  13. 1/2 cup plain greek yogurt
  14. 1 tablespoon vanilla extract
SUGAR SYRUP
  1. 1/4 cup water
  2. 50 grams or 1/4 cup white granulated sugar
  3. 3 tablespoons Grand Marnier
INGREDIENTS FOR COFFEE SWISS MERINGUE BUTTERCREAM
  1. 6 egg whites
  2. 400 grams or 2 cups granulated white sugar
  3. 450 grams or 2 cups softened unsalted butter
  4. 2 tablespoons milk
  5. 1 teaspoon vanilla extract
  6. 2 tablespoons instant coffee or espresso powder
WALNUTS
  1. 100 grams or 1 cup walnuts
  2. 1/4 cup pure maple syrup
  3. pinch of sea salt flakes
CAKE
  1. Preheat oven to 350 F and place oven rack in middle
  2. Grease sides of pan with butter and dust some flour then trace and cut out bottom of 9 inch pan with parchment paper and place inside pan. Set aside
  3. Chop semi sweet chocolate into small bits and put in large bowl and sift cocoa powder over chocolate, and add the 2 tablespoons of instant espresso powder or instant coffee
  4. Bring a pot or kettle of water to boil (at least 3 1/2 cups) But pour only 2 1/2 cups of boiling water over chocolate and whisk until it becomes smooth and silky. set aside
  5. In large bowl, sift flour, baking powder, baking soda, salt, whisk well and set aside
  6. Using a stand mixer with the paddle attachment, put sugar in bowl and add egg in one at a time making sure each egg has been incorporated into sugar.
  7. Once egg and sugar have become thoroughly combined, add the vegetable oil in a slow steady stream stirring on low- scrape sides and mix again
  8. Stir in the yogurt and vanilla extract
  9. Reduce to lowest speed and stir in flour in three additions and chocolate mixture in two additions. Mix until flour streaks have dissolved. Do not over mix
  10. Divide the batter equally into pans and bake for 30-35 minutes or until a tester comes out with just a few clean crumbs
  11. Allow to cool in pan for about 10 minutes. Place wire cooling rack on pans and invert cakes removing the parchment paper. Generously brush SUGAR SYRUP (instructions just below) while cake is warm Allow to cool completely another 1 1/2 hours
SUGAR SYRUP
  1. While cake is baking, in a small saucepan, bring the sugar and water to a boil stirring until sugar has completely dissolved
  2. Add the Grand Marnier while syrup is just a touch warm.
  3. Generously slather on both cake layers about 5 minutes after cake has come out of oven
WALNUTS
  1. Leave oven on at 350 F. Line a baking tray with parchment paper
  2. Place the walnuts in centre of tray and drizzle with the maple syrup and mix with wooden spoon
  3. spread nuts out evenly and bake for about 15 minutes, turning once halfway at about 8 minutes
  4. after
  5. Let cool for about 3 minutes before separating the walnuts and sprinkling the sea salts
  6. Keep all the caramelized bits of maple syrup to dress cake with
COFFEE SWISS MERINGUE BUTTERCREAM
  1. In a medium saucepan filled with couple inches of water on medium heat, place the stand mixer bowl with the 6 egg whites and 2 cups of white sugar and bring water to a simmer
  2. Whisk constantly until candy thermometer reads 160 F- check by rubbing a bit between your thumb and finger that the sugar has completely dissolved and isn't gritty
  3. Fit the mixer bowl in the stand mixer with the whisk attachment and whisk until medium-stiff peaks form and the bowl returns to room temperature about 10 minutes
  4. Whisk together the instant espresso or coffee powder with the milk until all the powder has been dissolved
  5. Turn the mixer down and stir in the vanilla extract and the epresso/coffee milk mix
  6. Change the whisk attachment to the paddle attachment and start dropping in the room temperature butter in a couple table spoons at a time. Make sure the butter is fully incorporated before adding the next dollop of butter.
  7. Once all the butter has been added beat another 5 minutes on medium
  8. Buttercream may look a bit lumpy at times...be patient, it'll smooth out with a couple minutes of beating.
ASSEMBLING THE CAKE
  1. First...make sure cakes are completely cool. Refrigerating overnight or freezing for about 15 minutes makes icing easier.
  2. Place first cake layer on your cake stand and spread out about a quarter of the buttercream with an offset spatula
  3. Top with the next layer of cake and spread buttercream with offset spatula on top and on sides of cake
  4. Sprinkle the walnuts and the caramelized maple glass
Notes
  1. -This recipe can easily be made into a single layer chocolate cake. Just divide all ingredients by half and bake in one 9 inch pan
  2. -I've read that swiss meringue buttercream can be stored in an airtight container in the fridge for up to 2 weeks...however consuming within a week is ideal. Make sure you bring to room temperature and beat again for about 3 minutes before icing onto cake...if it gets lumpy or appears like it's curdling, blast a hair dryer on the buttercream while its beating in the stand mixer or place on a double boiler for a couple minutes...just to get the butter to gel with the meringue again.
  3. -Store cake in fridge in a cake container for up to a week
By Betty Binon
STEMS & FORKS https://www.stemsandforks.com/

Filed Under: Baking Basics, Baking Tips, Cakes, Chocolate, Family Favorites

Mandarin Crème Pâtissière filled Donuts

December 20, 2017 By stemsandforks Leave a Comment

Life was not easy for my family growing up. We were new to the country (Canada), with barely any money, English or knowledge of what the western culture was like. The language, the food, the shopping and the holidays were all so very different including Christmas-something that wasn’t celebrated by Koreans back in the 70’s. Christmas of course, the most revered and celebrated by the western world was hard to avoid for my folks. It was everywhere, the malls, the streets, TV.  In fact my first memory of Christmas was when I was 4 years old. It was of my parents trying to figure out how to erect and decorate a Christmas tree for the very first time. All the meanwhile my father summarizing the Gospel of Luke and explaining how it was a lovely ‘fairytale’ invented by a group of people called ‘Christians’ and how Santa Claus was created to scare kids to behave. I distinctly remember him declaring, “So that means I’m Santa Claus. And if you obey me, you will get presents”. Yeah you could say my dad was the ultimate party pooper or just really fatigued and lost in this brave new world. 

By the time I was 10, our family skipped the tree and barely had anything festive in the home. Okay maybe a poinsettia or two. But that was it. Christmas eve dinner was usually at a Japanese or Korean restaurant where we exchanged gifts still in their original plastic bags. I shake my head in disbelief as I write this. But this was my family. My parents were too busy working hard to stay afloat to support three very sprightly growing girls so holidays were definitely not a priority. My family had plenty of spirit just no Christmas spirit. By the time I hit high school, we Shins decided to eschew Christmas. At the time it didn’t concern us. Until I had kids of my own. It was then I realized I had few Christmas memories.

Once I had kids, I  found myself doing the complete opposite of what my dad did. I was buying elf on the shelf and shifting the creepy little doll around every night and looking forward to my kids look of bewilderment and excitement (and maybe a bit of fear! Lol) when they’d see Elf had moved while they were sleeping. Telling my kids lovingly about how Santa watches kids all over the world to see who’s been naughty or nice. I even went as far as telling my 10 year old that her friends were liars when they told her Santa was bogus. And of course I began to bake with my kids… Cookies with a diy sprinkle buffet became a tradition (and a nightmare for vacuuming). And opening WRAPPED presents, wearing crowns at Christmas dinner and dancing in front of the Christmas tree with Feliz Navidad blaring. 

So I lied. I do have Christmas memories. I’ve made them for 11 years and I’ll continue to make them for as long as I’m able and I hope you can too. 

Wishing you all a very Happy Holiday. Best wishes for health and happiness in 2018. xo

Bon app! 

Mandarin Crème Pâtissière filled Donut TOWER
2017-12-20 19:41:07
Serves 30
A delicious cream filled donut perfect for a weekend or holiday snack or breakfast. This recipe yields 60 donuts so feel free to reduce the quantity.
Write a review
Save Recipe
Print
INGREDIENTS FOR THE DOUGH
  1. 6 teaspoons active dry yeast
  2. 1 1/2 cup milk (100 degrees to 110 degrees)
  3. 200 g or 1 cup + 3 teaspoons white granulated sugar
  4. 880 g or 6 3/4 cups all-purpose flour
  5. 6 large eggs room temperature
  6. 85 g or 6 tablespoons unsalted butter, room temperature
  7. 3 teaspoons salt
  8. 8 cups vegetable oil
INGREDIENTS FOR THE MANDARIN PASTRY CREAM
  1. 650 ml of freshly squeezed mandarins (about 15)
  2. 100 ml 35% cream
  3. 8 egg yolks
  4. 200 g or 1 cup of granulated white sugar
  5. Zest of 3 tangerines
  6. 60 g or 1/2 cup plus 1 table spoon of corn starch
  7. 1 teaspoon salt
  8. 200 g or 3/4 cup plus 2 tablespoons of unsalted butter cut into cubes
  9. 2 tablespoons Grand Marnier (optional)
FOR THE SUGAR DUSTING
  1. 300 g or 1 1/2 cups granulated white sugar
INSTRUCTIONS FOR THE DOUGH
  1. Warm milk to a simmer in small sauce pan until it reaches a heat of about 110F which is basically very warm but not uncomfortably warm when touched. Remove from heat and add the 3 teaspoons of sugar and yeast. Allow to get foamy and puff about 10 minutes or so
  2. Sift flour into stand mixer bowl with kneading hook attachment.
  3. Add the eggs, sugar (dough qty) and mix until batter is a bit shaggy...add the butter, and salt.
  4. Add the yeast milk mix and knead for about 8 minutes or until the dough has come together and is soft, smooth and bounces back when poked.- add spoon of milk if too dry or flour if too wet and knead again
  5. Put the dough in a lightly oiled bowl, cover with plastic and allow to rise for about 2 hours in a warm area of home.
  6. Once the dough has doubled, cut into thirds. (***unless you have already scaled this recipe back to make less donuts then there is no need to cut into thirds)
  7. Roll out each third onto a lightly floured surface to about 1/4 inch thickness.
  8. Use a 2 1/2 inch round biscuit/cookie cutter and cut about 20 rounds.
  9. Reuse scraps by re rolling and cutting (only re roll once, discard remaining dough)
  10. Place donut pucks onto trays lined with parchment paper and cover with a moist kitchen cloth and allow for the second rise about 20-30 minutes room temperature.
  11. Put vegetable oil in a large saucepan over medium heat, (370 degrees on a candy thermometer - If you don't have one..get one!) drop about 5 donuts in with a slotted spoon.(cook 5 at a time)
  12. Fry each side about 40-50 seconds. If oil is too hot the dough will turn a dark brown, turn down heat. You want to fry until golden.
  13. Use the slotted spoon to transfer the donuts to a baking sheet lined with paper towel.
  14. Roll in sugar while the donuts are still warm and transfer to a baking sheet with parchment paper.
  15. To save time, I drop the next 5 donuts into the oil by the time I'm sugaring the 3rd donut.
INSTRUCTIONS FOR THE MANDARIN CREAM PASTY
  1. In a medium sauce pan, simmer the mandarin juice and cream
  2. In stand mixer, with the paddle attachment, mix the egg yolks, sugar, salt and mandarin zest until light smooth and pale about 3 minutes
  3. Add the cornstarch in slowly and mix until smooth
  4. Pour about half the warm Mandarin/cream mixture into the egg/sugar mixture while the paddle is stirring
  5. Stir until combined. Scrape the stand mixer bowl
  6. Transfer to the medium sauce pan with the rest of the Mandarin/cream and whisk constantly on medium heat until it starts to boil.
  7. Once it starts to bubble, reduce heat to medium low and whisk continuously for another minute
  8. Remove from heat and add the butter cubes and Grand Marnier (Optional)
  9. Stir till butter is fully incorporated.
  10. Pour pastry cream through a sieve onto a tray lined with parchment paper.
  11. Cover with plastic wrap pressing against the pastry cream so no skin forms
  12. Refrigerate until ready to use
  13. When ready to use, give the pastry cream a quick low speed mix with the paddle attachment to get it pipe-able and smooth to use
PIPING DONUTS
  1. Use a skewer or better yet, a chopstick to make a hole in the donuts
  2. Fill a piping bag with the mandarin pastry cream with a #806 or #4 tip or even cutting out a small1/2 cm hole in a strong ziplock baggie can work
  3. Pipe cream into donuts
  4. You're ready to stack!
Notes
  1. *******PLEASE NOTE THIS RECIPE IS FOR A TOWER OF DONUTS!!! To make a reasonable amount for a family of 4-5 people, use only a third of the ingredients here to yield about 20 donuts
  2. Donuts should be eaten the same day but can be stored in an air tight container for up to 2 days in the fridge.
Adapted from Naomi Robinson-Bakers Royale (Dough only)
STEMS & FORKS https://www.stemsandforks.com/

Filed Under: Donuts, Family Favorites, French, Holidays

Chocolate and Orange Babka Wreath

December 10, 2017 By stemsandforks 8 Comments

Babka or brioche? My husband Pierre insists on calling this a brioche wreath. Wikipedia says babkas are traditionally used for Easter holidays in eastern European countries. In fact babka comes from the Polish word Baba for grandmother. And some researchers believe babka goes as far back to the Greek period of Homer based on anecdotal texts that mention sweet, yeast leavened bread similar to Babka. Brioche is a pastry (viennoiserie) with a high butter and egg content which gives it that tender butter rich crumb.  It origins date back to the early 1400’s in France. In any case, I don’t want to bore you with a history lesson. You’re here for a guaranteed holiday showstopper that tastes amazing. 

I fully admit that this recipe requires time and patience. Which is why it’s perfect for a special holiday like Christmas or Easter. Theres not much hands on prep time as there is time to wait for the dough to rise. 3 hours warm room temp or overnight in the fridge. Then another hour for the second rise. So if you came here looking for a quick treat, wrong recipe. This babka needs to be prepared in advance. But trust me it’s totally worth the wait.

…

Read More »

Filed Under: Chocolate, Christmas/Holidays, Family Favorites, Fruit, Winter

Kimchi & Egg Galettes

October 26, 2017 By stemsandforks 1 Comment

Kimchi, kale, spinach and chèvre in a crusty, flaky buttery pastry topped with an egg – who can resist such a plethora of flavours? This delightful dance of sweet/savoury, rich/acidic, chewy/flaky and hearty galette is my interpretation of Omurice. I was inspired by this childhood favourite comfort dish originally from Japan. Omurice is essentially fried rice crowned with a paper thin omelette, with ketchup slathered atop. Koreans have adapted it by adding kimchi (of course), along with a mish-mash of proteins, seafood or veggies in the rice. Omurice can really be made of anything. So long as it’s fried rice blanketed by an omelette. Its name is a quintessential example of Gairaigo which basically means a transvocalization. ‘Omu’ for omelette, and ‘raisu’ for rice.

…

Read More »

Filed Under: Belgian in the House, Family Favorites, Fusion, Galettes, Korean, This Korean Bakes

Chocolate Ricotta Cake with Mascarpone Mocha Buttercream

August 27, 2017 By stemsandforks Leave a Comment

Since I started blogging, the friendships I’ve made with other fellow food bloggers and stylists has been incredible to say the least. 

Recently fellow instagrammer @rodica_godlewski and I organized a food styling gathering at my home with fellow food stylists M.Aimee from @milkofthykindness and Sarah from @sarah.boileau. We were 4 complete strangers…well strangers that conversed for several months prior to our meeting on Instagram but had never seen each other in the flesh or spoken to each other. It was so lovely to finally put a face larger than a blueberry and a voice to their names. To finally shed cyber palling two dimensionally and begin a real friendship in the flesh was incredible. The ideas and inspiration we shared with each other not to mention the great laughs was epic in porportions. 

…

Read More »

Filed Under: Cakes, Chocolate, Family Favorites

Triple Berry Scones with Lemon Vanilla Drizzle

August 17, 2017 By stemsandforks 10 Comments

I often laugh when someone writes a recipe declaring it easy, fast or that cooking is therapeutic. For me cooking and baking is not easy. It’s work regardless how simple the steps are to a recipe. The whole process of prepping, cooking and washing up…(especially washing up) is long and can be tedious at times. For me there is nothing therapeutic about cooking and baking. But there is something satisfying, fulfilling and validating about the process of cooking. If I had to compare it to something…hmmm… maybe giving birth to a child?  I’m not saying that a child is on the same level as a fresh loaf of banana bread. But the expression of something as profound as pregnancy being referred to “something in the oven” sums up what baking is in an exaggerated way. Getting ready for your child requires, well the creation (clears throat), the nurturing and caring while in the “oven” and than labour – blood sweat and tears- the finale- a reward…your beautiful baby or that fresh banana loaf. But it’s 100% all you and created by you.

I recently did a friend a favour and received several boxes of various berries and fruits. Gorgeous tiger and dark figs, cherries, strawberries, blueberries and kiwis. I planned to make something with the figs but they were at its prime and I admit my family and I scarfed them down in a matter of minutes. Kiwis – I’m sorry. But I don’t like you. You’re guilty by association. After getting sick one day as a child and barfing the green seedy exotic fruit all over my brand new overalls, I have never been able to try them again. So cherries, blueberries and strawberries in a triple berry scone (I know it’s not a berry…but they’re adorable like a berry) 

I made these scones when I was in a pinch to make a quick thank you for my daughters friend for hosting her at their cottage. Now if you are skipping the glaze (which I don’t recommend), try adding a touch more sugar as I lessened the usual ratio. Not crazy about super sweet scones but the drizzle does add a perfectly balanced and lovely sweet citrus zing. Remember, scones should be tender, slightly flakey, buttery with a touch of sweetness.  So here it is. A super fast and easy scone recipe (sniggering- bahaha). 

Bon app!


Save Print
Triple Berry Scones with Lemon Vanilla Drizzle
Author: Betty Binon
 
Ingredients
  • FOR THE SCONES:
  • 260 g or 2 cups AP flour
  • 2½ teaspoons baking powder
  • pinch of table salt
  • ½ teaspoon of cinnamon powder
  • 50 g or ¼ cup granulated sugar
  • 115 g or ½ cup butter or 8 tablespoons cold unsalted butter
  • ½ cup heavy cold cream
  • 1 large egg
  • ⅓ cup overflowing fresh blueberries
  • ⅓ cup overflowing freshly chopped strawberries
  • ⅓ cup overflowing with pitted cherries
  • ⅓ cup toasted walnuts (optional)
  • FOR THE DRIZZLE:
  • 125 g or 1 cup icing sugar
  • 4 tablespoons freshly squeezed lemon juice
  • 1 teaspoon vanilla bean paste
Instructions
  1. FOR THE SCONES:
  2. Preheat oven to 400F (205C), line baking tray with parchment paper
  3. In a medium metal or plastic bowl, grate butter on box grater's biggest hole and pop in freezer uncovered- let it sit in freezer while you gather rest of ingredients
  4. In large bowl, sift flour, baking powder, cinnamon, salt and sugar and whisk well and set aside
  5. In a small bowl, whisk the egg and cream together and set aside
  6. Add the cold butter in the flour mixture with fingers, tossing for about 15-20 seconds
  7. Pour the cream/egg mixture to the dry flour mix and stir gently with spatula - DO NOT over stir. stir still ingredients become just wet
  8. Fold in all the berries and the nuts (if you're adding)- don't overwork dough here
  9. shape the dough into a disc about 8 inches wide and about 1.5 inches thick
  10. With a sharp knife, cut the disc into about 6-8 equal wedges and separate about 1 cm at most
  11. Bake for 20-25 minute or until the crust is a golden brown
  12. Allow to cool before drizzling icing
  13. FOR THE ICING:
  14. In a bowl whisk together the freshly squeezed lemon juice, vanilla bean paste and icing sugar
  15. Drizzle over scones once they've cooled somewhat
3.5.3226


Filed Under: Biscuits/Scones, Family Favorites, Fruit

  • Go to page 1
  • Go to page 2
  • Go to Next Page »

Primary Sidebar

Stems & Forks Newsletter

Categories

Archives

Copyright © 2023 · stemsandforks.com · Disclaimer · Terms of Use · Privacy Policy · Contact